Adding Subtitles macOS Menu Items using SwiftUI
At this point, AppKit developers with their finger on the pulse may be familiar with setting subtitles on NSMenuItem using the subtitle property, which has been available since macOS 14.4. In fact, I was the one who added it back when I worked at Apple.
Achieving the same in SwiftUI requires a different approach and is definitely less obvious and opaque – but is also possible. Here I'll aim to briefly show how to add subtitles to menu items in SwiftUI, and how this technique could work across both Menu and Picker components.
The Trick
The key insight is that we can use multiple Text views within a Button's label to force SwiftUI to interpret the first Text view as a title, and the second one as a subtitle. When bridging to NSMenuItem, the contents of the Text views will map to -[NSMenuItem title], and -[NSMenuItem subtitle] respectively.
Let's look at a simple example first:
struct ContentView: View {
var body: some View {
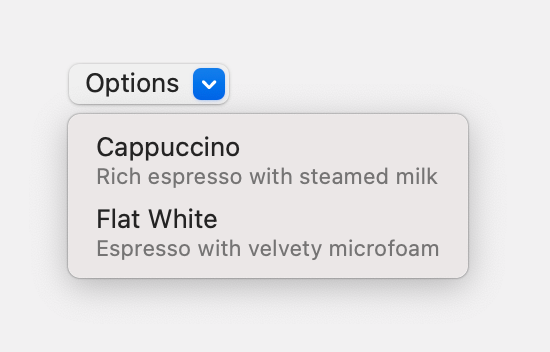
Menu("Options") {
Button {
print("Cappuccino selected")
} label: {
Text("Cappuccino")
Text("Rich espresso with steamed milk")
}
Button {
print("Flat White selected")
} label: {
Text("Flat White")
Text("Espresso with velvety microfoam")
}
}
}
}
This results in the following appearance.
Using a Picker
Note that since this is a Menu, it is not the appropriate choice if you'd like to automatically bind its value to some data. You would use a Picker in that case instead.
The trick here remains the same, but now the action closure on your Button effectively becomes a no-op, used only as a hint for the SwiftUI bridging logic, since the action execution to update the Binding's wrapped value will be handled by the Picker directly.
Consider the following, more complete example for ordering coffee, combining both techniques.
struct CoffeeOrder: Identifiable, Hashable {
let id: UUID
let name: String
let description: String
let price: Double
static let sampleOrders = [
CoffeeOrder(id: UUID(),
name: "Cappuccino",
description: "Rich espresso with steamed milk",
price: 4.50),
CoffeeOrder(id: UUID(),
name: "Flat White",
description: "Espresso with velvety microfoam",
price: 4.75),
CoffeeOrder(id: UUID(),
name: "Cold Brew",
description: "Smooth, cold-steeped coffee",
price: 3.95)
]
}
struct CoffeeOrderView: View {
@State private var selectedOrder: UUID?
let orders = CoffeeOrder.sampleOrders
var body: some View {
VStack {
// Subtitles in Menu:
Menu("Place Order") {
ForEach(orders) { order in
Button {
print("Selected: \(order.name)")
} label: {
Text(order.name)
Text("\(order.description) - $\(String(format: "%.2f", order.price))")
}
}
}
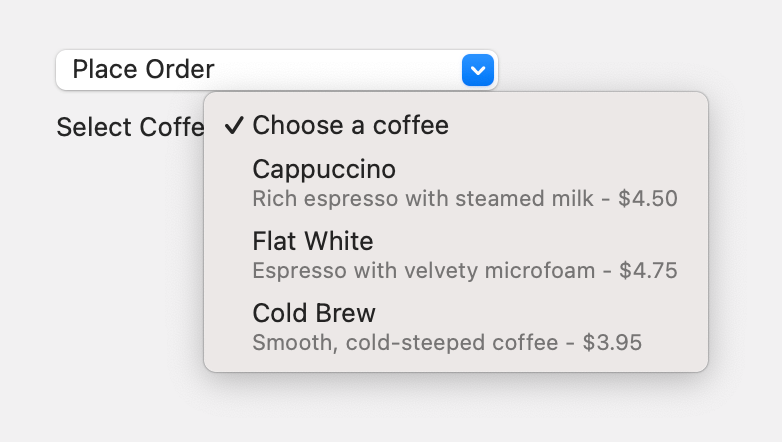
// Subtitles in Picker:
Picker("Select Coffee", selection: $selectedOrder) {
Text("Choose a coffee")
.tag(Optional<UUID>(nil))
ForEach(orders) { order in
Button { } label: {
Text(order.name)
Text("\(order.description) - $\(String(format: "%.2f", order.price))")
}
.tag(Optional(order.id))
}
}
}
.padding()
}
}
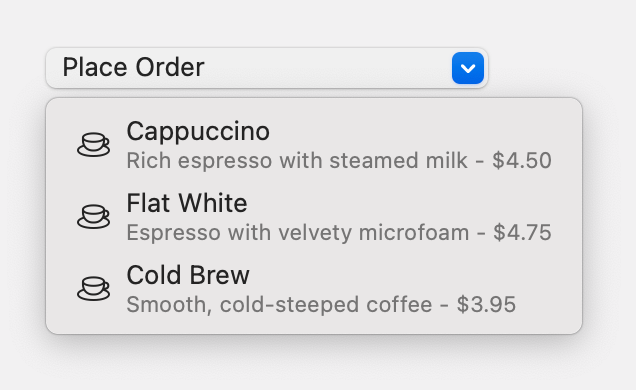
Adding Images
As you may have guessed by now, we can use the same technique to provide an image, a title, and a subtitle at the same time, by simply adding an Image as part of the label.
Button {
    print("Selected: \(order.name)")
} label: {
    Image(systemName: "cup.and.saucer")
    Text(order.name)
    Text("\(order.description) - $\(String(format: "%.2f", order.price))")
}
Binary Compatibility
Due to some implementation details of NSMenuItem, you may see different results depending on whether your title maps to a plain or an attributed string.
If your title is effectively an attributed string, it will be mapped to -[NSMenuItem attributedTitle] instead of -[NSMenuItem title]. Before macOS 15, if your title Text results in a mapping to NSAttributedString, the subtitle will be ignored. While this is not the case on macOS 15 and later, it is generally useful to keep the distinction in mind, as menus generally tend to handle attributed titles differently, and since SwiftUI Text doesn't make that clear of a distinction.