Building a Universal Mini vMac Application
This project demonstrates a collection of techniques for consolidating various Mini vMac variations into one application, enabling better code reuse and simplifying maintenance.

Early Macintosh computers have played a huge role not just in personal computing in general, but in core areas like UI design and systems and framework engineering. Apart from these machines just being really, really cool, I have a firm belief that interacting with old technology can serve as inspiration for future innovation in the areas of HCI, frameworks, and systems engineering.
The most accessible way to interact with older Macintosh models is using emulators. Mini vMac, Basilisk II, and SheepShaver all serve a similar purpose: emulating Macintosh computers from different eras.
However, I've always found the process of setting up one of these emulators to be quite cumbersome and not user-friendly. It takes a lot of research and familiarity with software development to get started. In other words, you kind of have to be a bit of a nerd to set one up. If we want more people to discover the joy of vintage computing – and I really do – the process has to become a whole lot more refined and user-friendly. That's why, on and off for a few years, I've been working on a modern macOS emulation environment to make these machines more accessible to an average user.
In this (admittedly more technical) post, I'll walk through one specific aspect of that effort: the techniques for combining multiple Mini vMac emulator variations into a single universal macOS binary with a well-defined public interface.
Background
Mini vMac's architecture relies heavily on C preprocessor directives for conditional compilation. Each Macintosh model variation requires its own set of configuration headers (typically generated by the setup tool) that define hardware capabilities, screen dimensions, ROM specifications, and other model-specific features. This design choice makes sense from an emulation perspective – it allows the maintainer to optimize specifically for each model's characteristics and ensures only the necessary code paths are included.
However, this traditionally means maintaining separate application builds for each model. And, while building a more universal environment for emulating many kinds of Macintosh computers, I'd effectively have to maintain a binary at least for each of the supported models. Let's explore how we can maintain this compilation model while packaging everything into a single, more maintainable application.
The general approach will be the following:
- Automate the generation of the required header files for each of the 7 computers we want to support: 128K, 512Ke, Plus, SE, Classic, SE FDHD, and II.
- Implement the principal class that conforms to the common protocol exposed to both the universal application and each of the frameworks.
- Package each model into a framework bundle, with reused source code.
- Configure the application to dynamically load the correct framework bundle and interface with its principal class to emulate the specific machine known at runtime.
Generating Configuration for Each Model
The first challenge is generating appropriate configuration headers for each model. The general setup process using minivmac for a specific model involves building the setup tool:
gcc -o setup_t ./setup/tool.c
After that, we can use the setup tool to generate the configuration headers for the model. On macOS, that also generates the Xcode project that wraps it into an application.
./setup_t -e xcd -t mcar -sound 1 -drives 20 -sony-sum 1 -sony-tag 1 -sony-dc42 1 -speed z > generate_xcodeproj.sh
bash ./generate_xcodeproj.sh
For the purposes of generating a single application that encapsulates multiple conditionally compiled models, we don't really care about the generated Xcode project, and only want the headers.
Ideally, this process can be automated for each of the models we want to support. So, I have written the setup.sh script that defines the 6 Macintosh models and goes through the process of building the configuration for each one. It then takes only the generated headers and puts them into Configuration folder, removing the other artifacts. What we're left with is 6 directories for each of the Macintosh models, and the unmodified minivmac source.
The script will also include our custom additions for dynamic loading. We'll define a unique principal class name and the display name for each of the frameworks, like so:
// Custom configuration for Macintosh 128K:
#define MMPrincipalClassName Macintosh128KEmulatorVariation
#define MMDisplayName Macintosh 128K
Framework Architecture
Each model variation is compiled as a separate framework. The key is that all frameworks:
- Share the same Mini vMac source code;
- Use model-specific configuration headers;
- Conform to a common protocol.
Here's our base protocol:
@protocol EmulatorVariation <NSObject>

- (instancetype)initWithROMAtPath:(NSString *)path;
- (void)start;
- (BOOL)insertDiskAtPath:(NSString *)path;

@end
We will then define a common implementation file that will be reused across each of the frameworks.
Setting up the .m File
Now let's build the single implementation that we'll reuse across our targets. This is the single case in the entire architecture where we won't use the minivmac source verbatim, instead customizing it and adding a wrapper class.
- Locate the
OSGLUCCO.mimplementation file and copy its contents into ourMacintoshVariation.mfile (the name is arbitrary; feel free to come up with something better). - Define the principal class. Note how we'll use the
#definekey.
#import "EmulatorVariation.h"

NSString *_ROMFilePath;

NS_ASSUME_NONNULL_BEGIN

@interface MMPrincipalClassName : NSObject <EmulatorVariation>

@end

NS_ASSUME_NONNULL_END
Note how we're using MMPrincipalClassName to define the principal class. This will be replaced with the value we defined earlier, resulting in a unique principal class name for each of the generated frameworks. This also allows us to share the same source code, including the .m file, across all of the implementations, without the need to write any target specific code.
- Implement the wrapper.
@implementation MMPrincipalClassName

- (instancetype)initWithROMAtPath:(NSString *)path {
    if (self = [super init]) {
        _ROMFilePath = path;
    }
    return self;
}

- (void)start {
    ZapOSGLUVars();

    if (InitOSGLU()) {
        ProgramMain();
    }
    UnInitOSGLU();
}

- (BOOL)insertDiskAtPath:(NSString *)path {
    return Sony_Insert1(path.stringByStandardizingPath, false);
}

@end
- Remove the application initialization code.
Since we'll initialize the emulator from an existing NSApplication, we don't need to do that setup again, so simply remove it.
From InitCocoaStuff, we'll remove the following line:
[MyNSApp run];
Xcode Build Settings Setup
Let's outline how to create an individual framework target.
We have already created the EmulatorVariation protocol definition. This will be exposed to both the top-level application and each of the framework targets.
Next, let's create the template Info.plist that will be preprocessed by each of the frameworks. I've called it Variation-Info.plist. This is where we'll make use of our MM-prefixed #defines.
<?xml version="1.0" encoding="UTF-8"?>
<!DOCTYPE plist PUBLIC "-//Apple//DTD PLIST 1.0//EN" "http://www.apple.com/DTDs/PropertyList-1.0.dtd">
<plist version="1.0">
<dict>
    <key>CFBundleDevelopmentRegion</key>
    <string>en</string>
    <key>CFBundleDisplayName</key>
    <string>MMDisplayName</string>
    <key>CFBundleExecutable</key>
    <string>$(EXECUTABLE_NAME)</string>
    <key>CFBundleGetInfoString</key>
    <string>MMDisplayName</string>
    <key>CFBundleIdentifier</key>
    <string>$(PRODUCT_BUNDLE_IDENTIFIER)</string>
    <key>CFBundleInfoDictionaryVersion</key>
    <string>6.0</string>
    <key>CFBundleName</key>
    <string>$(PRODUCT_NAME)</string>
    <key>CFBundleShortVersionString</key>
    <string>1.0</string>
    <key>CFBundleSignature</key>
    <string>????</string>
    <key>CFBundleVersion</key>
    <string>$(CURRENT_PROJECT_VERSION)</string>
    <key>NSPrincipalClass</key>
    <string>MMPrincipalClassName</string>
</dict>
</plist>
Now, let's actually create a framework target, making sure to name it in the same way we named the corresponding Configuration subdirectory, for example "Macintosh 128K." We'll now have to do a few things in the new target's Build Settings.
- Set up
Info.plistpreprocessing to replace those template values. Use the newly created header and the target-specific header containing the corresponding#defines for preprocessing. Finally, enable preprocessing.
INFOPLIST_FILE = $(SRCROOT)/Mini vMac/Emulators/Variation-Info.plist
INFOPLIST_PREFIX_HEADER = $(SRCROOT)/Configuration/$(PRODUCT_NAME)/CNFUDALL.h
INFOPLIST_PREPROCESS = YES

- Disable ARC.
CLANG_ENABLE_OBJC_ARC = NO

- Limit header search paths to those required for the target.
This is a subtle step: the target will compile without it, but with default search paths, you won't end up using the target-specific headers you want; instead, we'll always pick up whichever ones we find first – in my case, ones in Configuration/Macintosh 128K. So, without this step, we'll accidentally end up with 7 emulators for Macintosh 128K.
The first step here is simple: disable header maps.
Then, we must customize User Header Search Paths.
"$(SRCROOT)/Configuration/$(PRODUCT_NAME)"will pick up the configuration specific headers we have generated.""$(SRCROOT)/Submodules/minivmac/src"will find the headers from theminivmacsource."$(SRCROOT)/Mini vMac"will pick up our protocol definition.
In total, after step 3, we'll have:
USER_HEADER_SEARCH_PATHS = "$(SRCROOT)/Configuration/$(PRODUCT_NAME)" "$(SRCROOT)/Submodules/minivmac/src" "$(SRCROOT)/Mini vMac"
USE_HEADERMAP = NO

Build Phases
Let's setup the build phases for our framework.
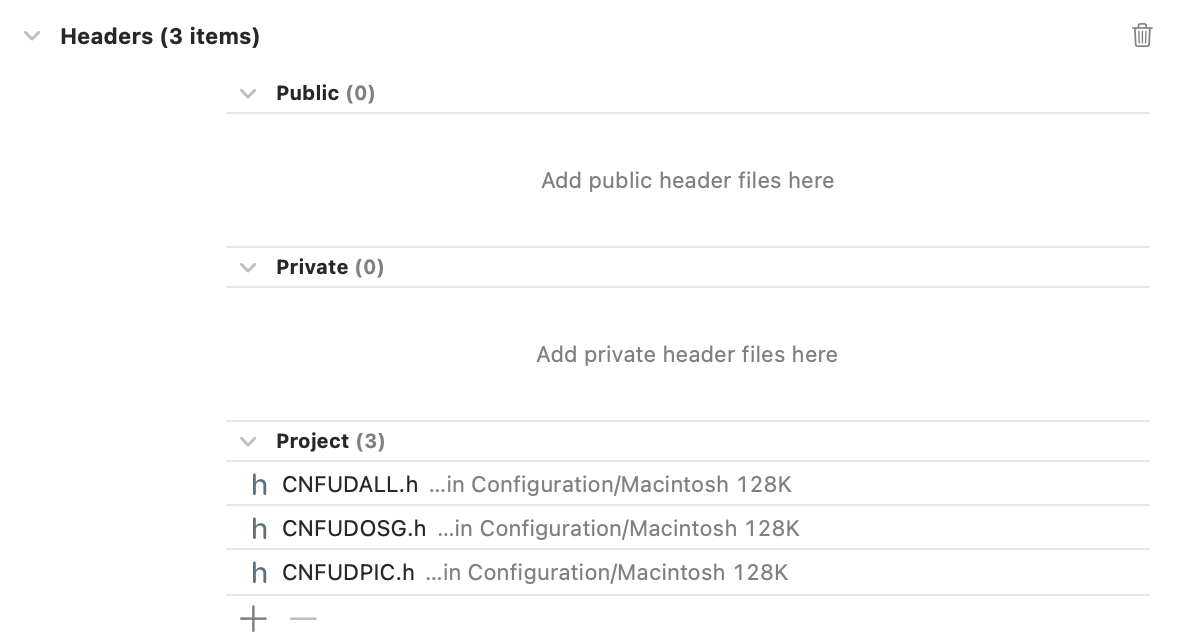
- Make sure to include the 3
CNFUD-prefixed headers from the corresponding configuration subfolder.
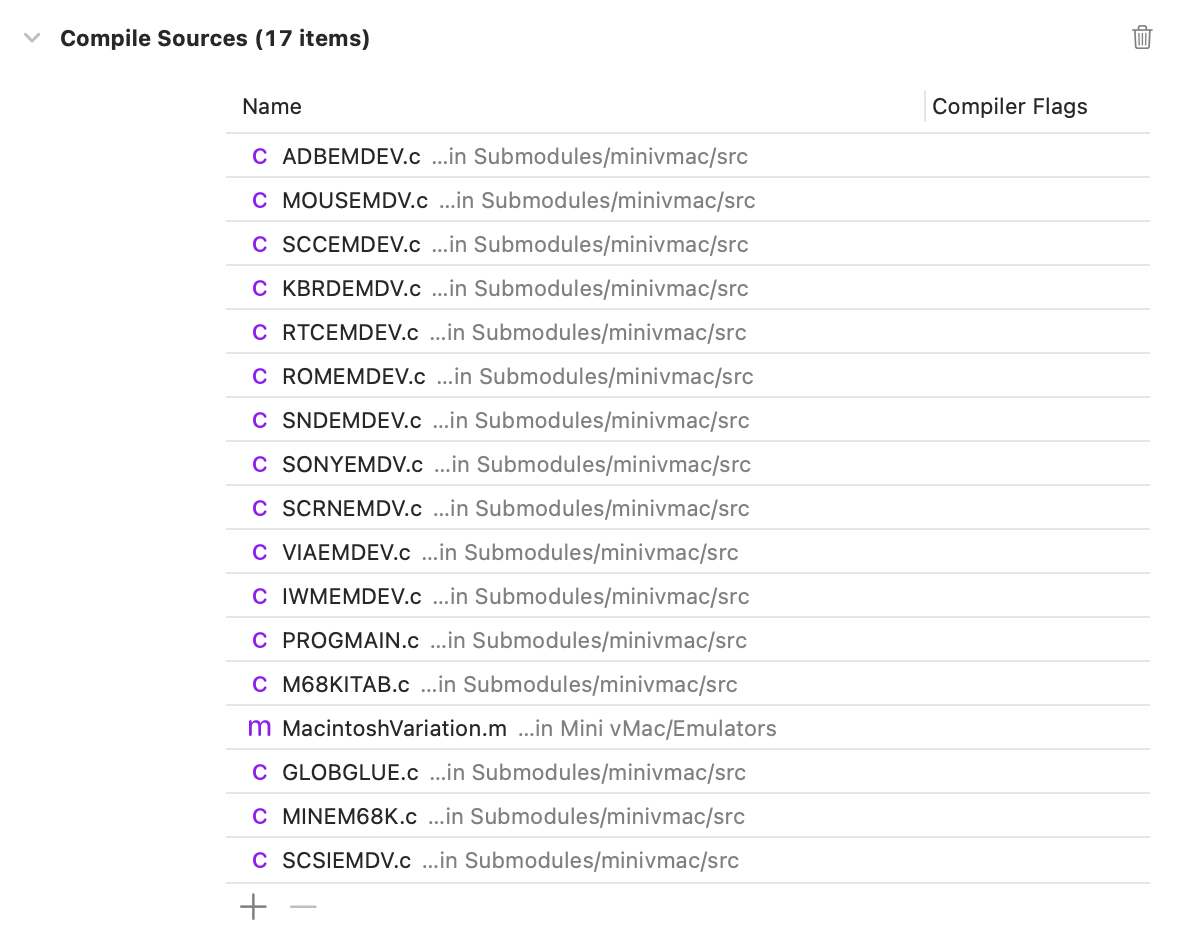
- In Compile Sources, add the required
minivmacsources and our.mfile that contains the principal class we had defined earlier.
Generating the Rest
To generate the rest of the frameworks, you can simply duplicate the target. You'll need to customize the name, bundle identifier, and redo the Build Phases step, but all of the Build Settings will carry over automatically in the process.
Universal Application Design
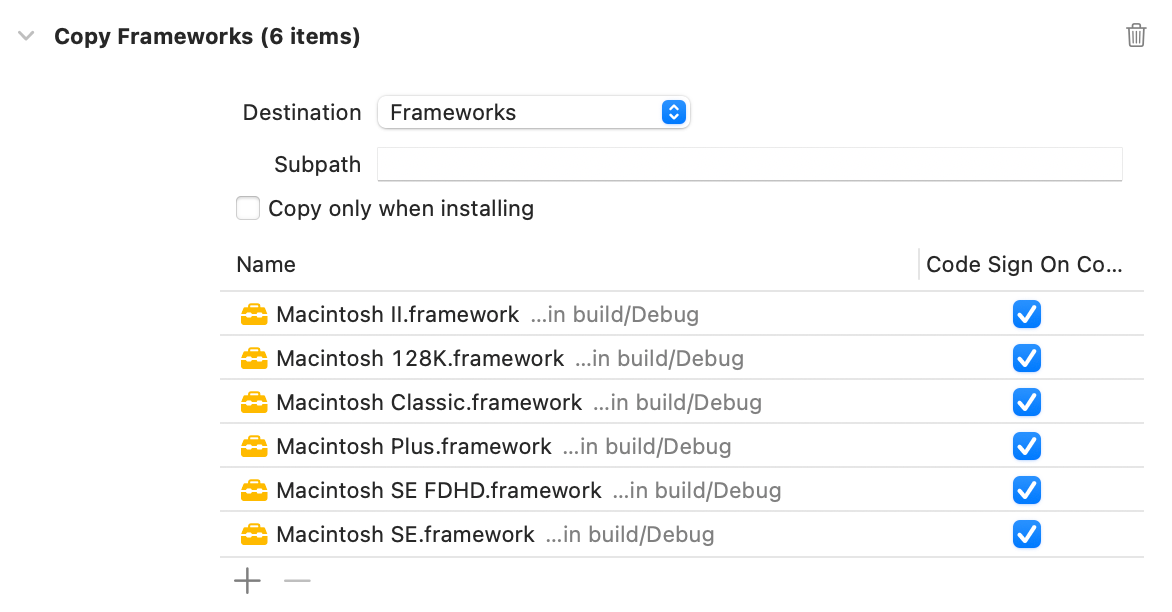
The application will need to include all of the individual frameworks, ideally without loading them. Ideally, we can go to the Build Phases tab and:
- Add a new Copy Files phase.
- Change the Destination to Frameworks.
- Add all of the frameworks.
This will copy the frameworks into the Private Frameworks folder in our application's bundle.
Next, we will dynamically load the appropriate framework based on launch arguments. We use Swift's ArgumentParser for clean argument handling. In a more sophisticated implementation, this may be determined automatically by verifying the checksum of the supplied ROM file, and / or allow for a GUI based configuration by the user at runtime.
struct AppArguments: ParsableCommand {
    @Option(name: .customLong("emulator", withSingleDash: true))
    var emulatorName: String

    @Option(name: .customLong("rom", withSingleDash: true))
    var romPath: String

    @Option(name: .customLong("disks", withSingleDash: true))
    var disks: [String]
}
The application delegate handles framework loading and emulator initialization:
@NSApplicationMain
final class AppDelegate: NSObject, NSApplicationDelegate {
    func applicationDidFinishLaunching(_ aNotification: Notification) {
        let arguments = AppArguments.parseOrExit()

        // Dynamic framework loading code...
    }
}
Framework Loading and Initialization
The framework loading process is particularly interesting:
- We locate the framework in the application bundle.
- Load it dynamically.
- Access the principal class (our emulator variation).
- Initialize the emulator with the provided ROM.
guard let frameworksURL = Bundle.main.privateFrameworksURL,
      let urls = Bundle.urls(forResourcesWithExtension: nil, subdirectory: nil, in: frameworksURL) else {
    fatalError("Could not find the private frameworks URL for the main bundle.")
}

let bundles = urls
    .filter { $0.deletingPathExtension().lastPathComponent == arguments.emulatorName }
    .compactMap { Bundle(url: $0) }

guard let bundle = bundles.first else {
    fatalError("Could not load an emulator bundle for name '\(arguments.emulatorName)'.")
}

try! bundle.loadAndReturnError()
Of course, for any production code, we should handle the above errors more gracefully!
Building and Running
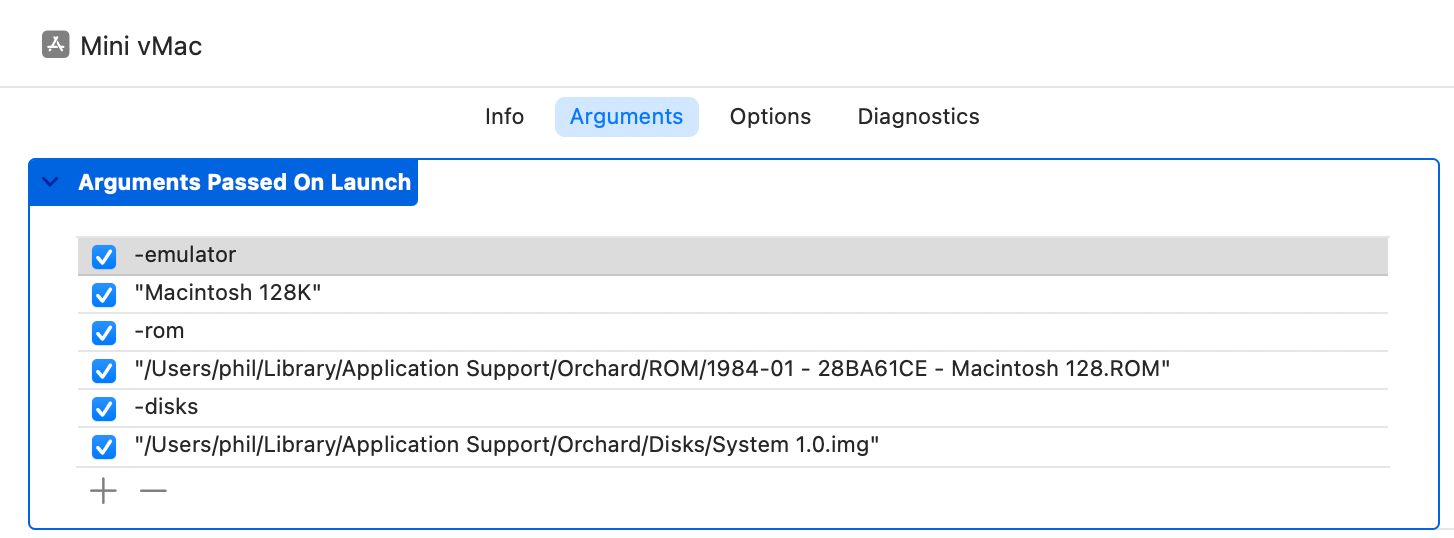
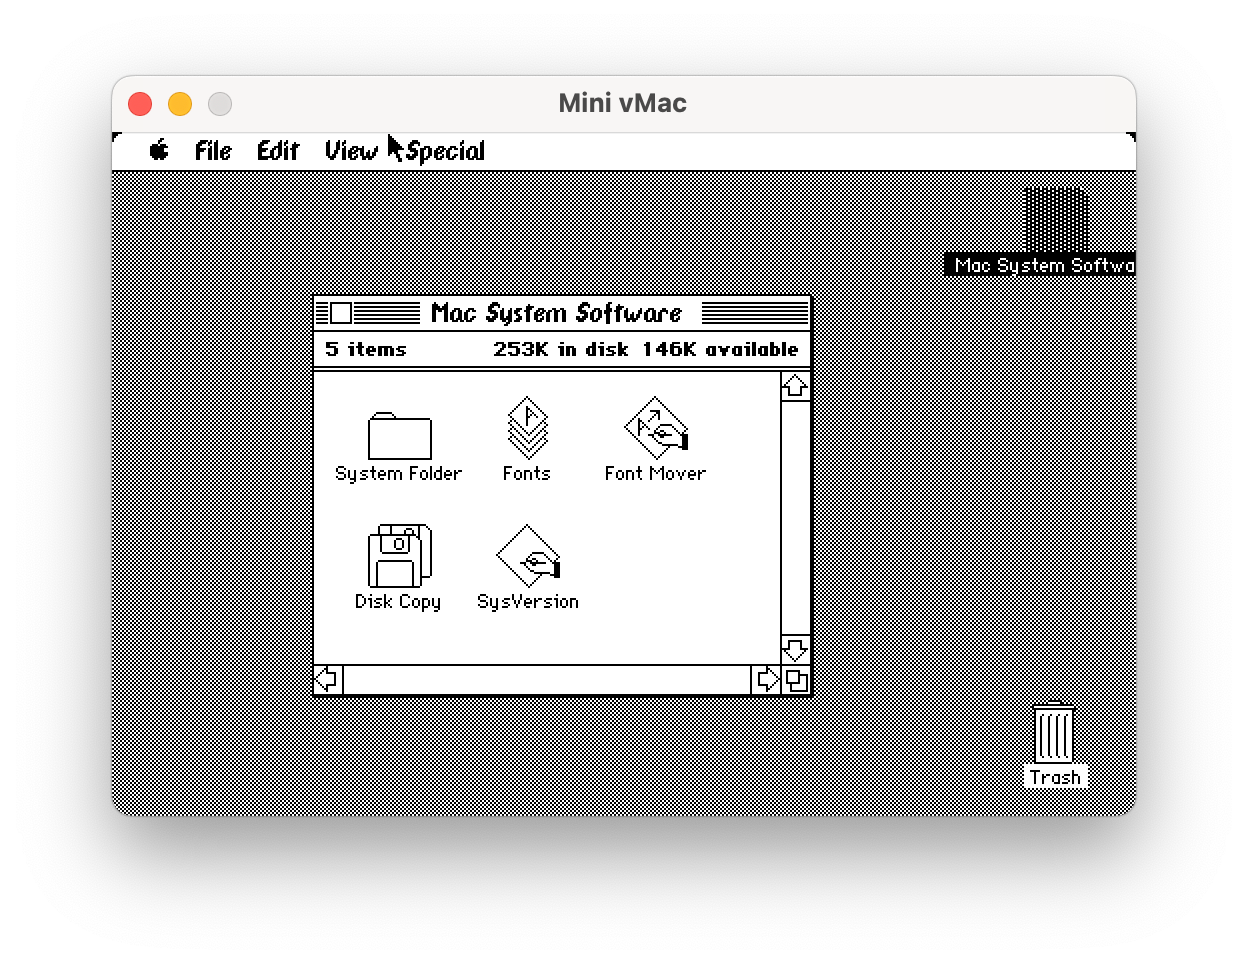
To test our implementation, I'll use Xcode's Scheme editor to pass the app arguments and emulate the Macintosh 128K with System 1.0 on board.
I've called the project minivmac-universal, and made all code available on GitHub. I intend to use this technique to continue building my universal user-friendly vintage Macintosh environment, and will hopefully share more progress and details soon.
In its current version, the environment maintains various emulators (like Mini vMac, Basilisk II, and SheepShaver) as embedded executables, which are managed using NSTask. Upon launch, each uses injected code to host its windows in the parent process using some SPI (private API) tricks that I will not share. This technique will allow me to run all of the emulators in-process instead, which will simplify event handling and layer hosting, and allow for better code reuse and faster iteration on user-facing features.
Further Reading
If you're not very familiar with vintage Mac emulation, I highly recommend reading A Guide to Legacy Mac Emulators.
In addition, when working with Mini vMac, it can be useful to familiarize yourself with the Control Mode and Options for Developers.
Finally, the minivmac source is always a fascinating read.