Using the Dump Menu Debug Feature on macOS 27 Beta
The AppKit Debug menu is a debugging tool that has been shipping as part of the framework and hence macOS itself for a few years. The Dump Menu debug feature is a new addition in macOS 27 that I think could be useful.

The AppKit Debug menu is a debugging tool that has been shipping as part of the framework and hence macOS itself for a few years. You can enable it with a user default. Once enabled, you will see the little bug icon just before the Help menu item in the menu bar across applications.

The debug menu is quite helpful if you’re developing for the Mac, especially if you utilize Apple’s toolkit and are familiar with core AppKit concepts such as target-action and the responder chain. You get a few convenient features, such as the ability to inspect the responder chain, view user defaults, see bundle information, and a lot more. The best part is that unlike the true debug features built into Xcode, you don’t have to be running the debug version of an application to see the menu, making it quite helpful for introspecting behavior and even class names in other apps.
On macOS 27, the AppKit Debug menu gains a few welcome additions. The one that caught my attention, unsurprisingly, was the Dump Menu submenu.
Dumping menus
As of Seed 1, the menu contains two options:
- Main Menu,
- Next Contextual Menu.
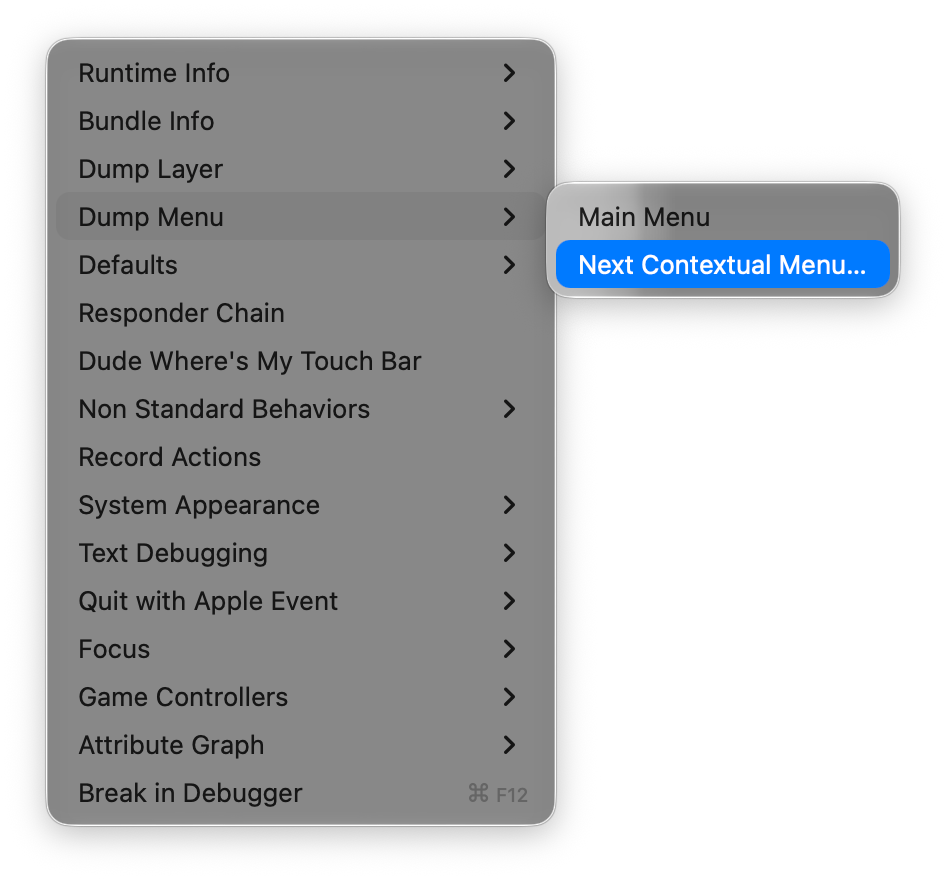
The titles are quite self-explanatory. Selecting Main Menu will dump the contents of the menu bar, including all its submenus. Next Contextual Menu defers its functionality, however. If can select it first, then trigger any contextual menu in the app (e.g. by right-clicking a row in Finder), it will dump whatever the first contextual menu shown in the application right after triggering the action was.
The menus are dumped inside the temporary directory, as XIB files. The format choice is unsurprising from the technical perspective. The menu system already has the required Interface Builder infrastructure, so hooking into it wouldn’t require any new substantial implementation burden, unlike some bespoke format. You also get the benefit of being able to inspect the menu visually, which is welcome given the nesting can be quite cumbersome to navigate with a text-only format.
Once a menu is dumped, it will open in Xcode automatically. Here are a few obvious techniques that I will certainly find useful in my workflows – and think you might too.
What’s that icon?
When I work on a Mac app, I try to pay conscious attention to the consistency of the user experience I am crafting with both the system and other applications. This is especially true of menus, which I believe are the most useful accelerators when they provide a consistent experience across all apps.
Let’s say I’m building a Finder-like file navigation feature for my document-based app. Of course, I want to be consistent with Finder, which involves using consistent titles, structure, and icons for the relevant functionality. While titles are trivial, I unfortunately do not have all of the SF Symbols memorized, and sometimes struggle with finding the right match. And now, I don’t have to! I can just dump the main menu of Finder, navigate to the relevant item in the XIB, expand the inspector, and see all the properties of the menu item, including the image.
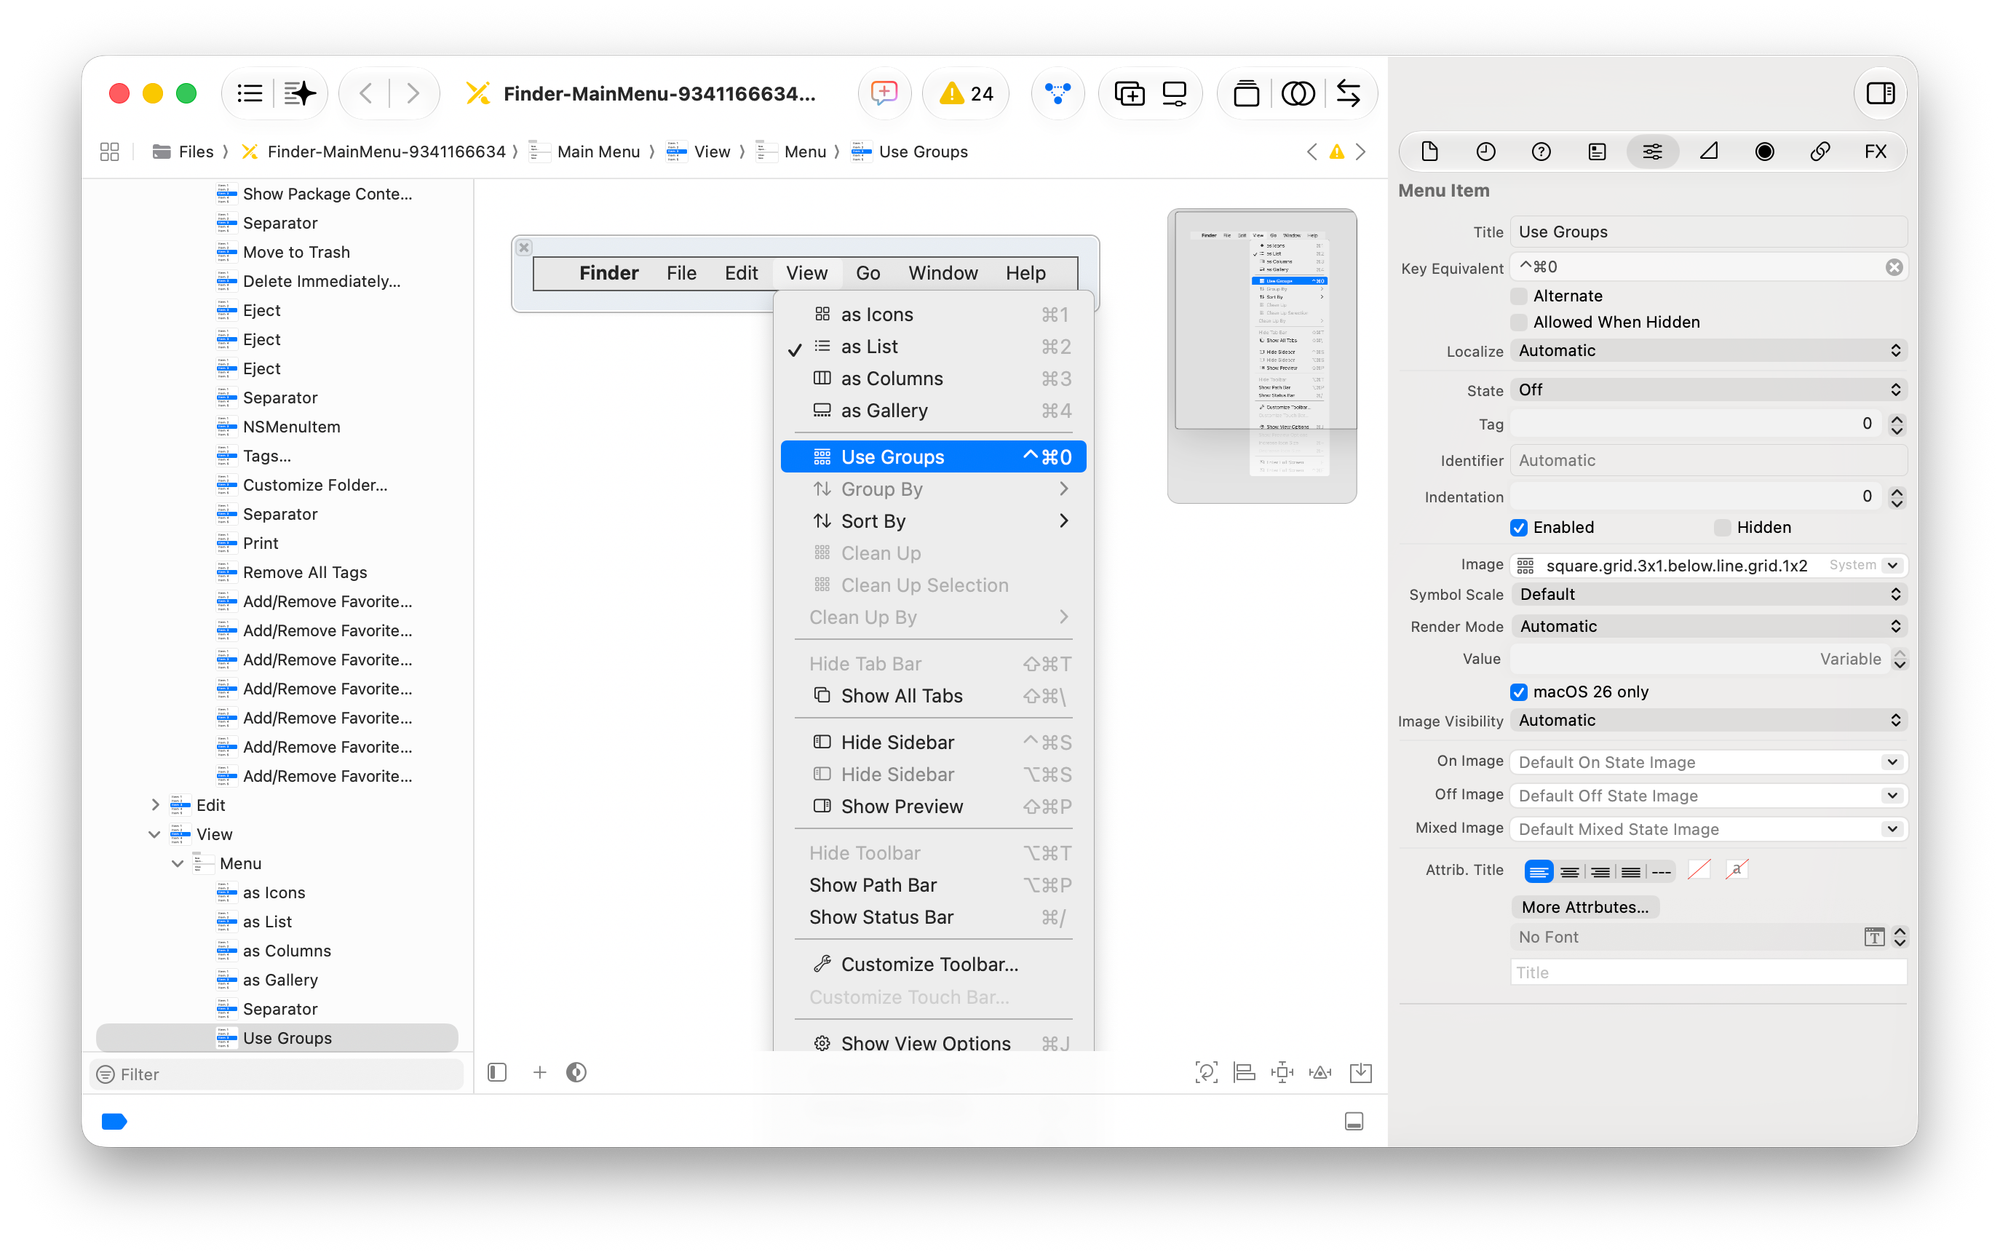
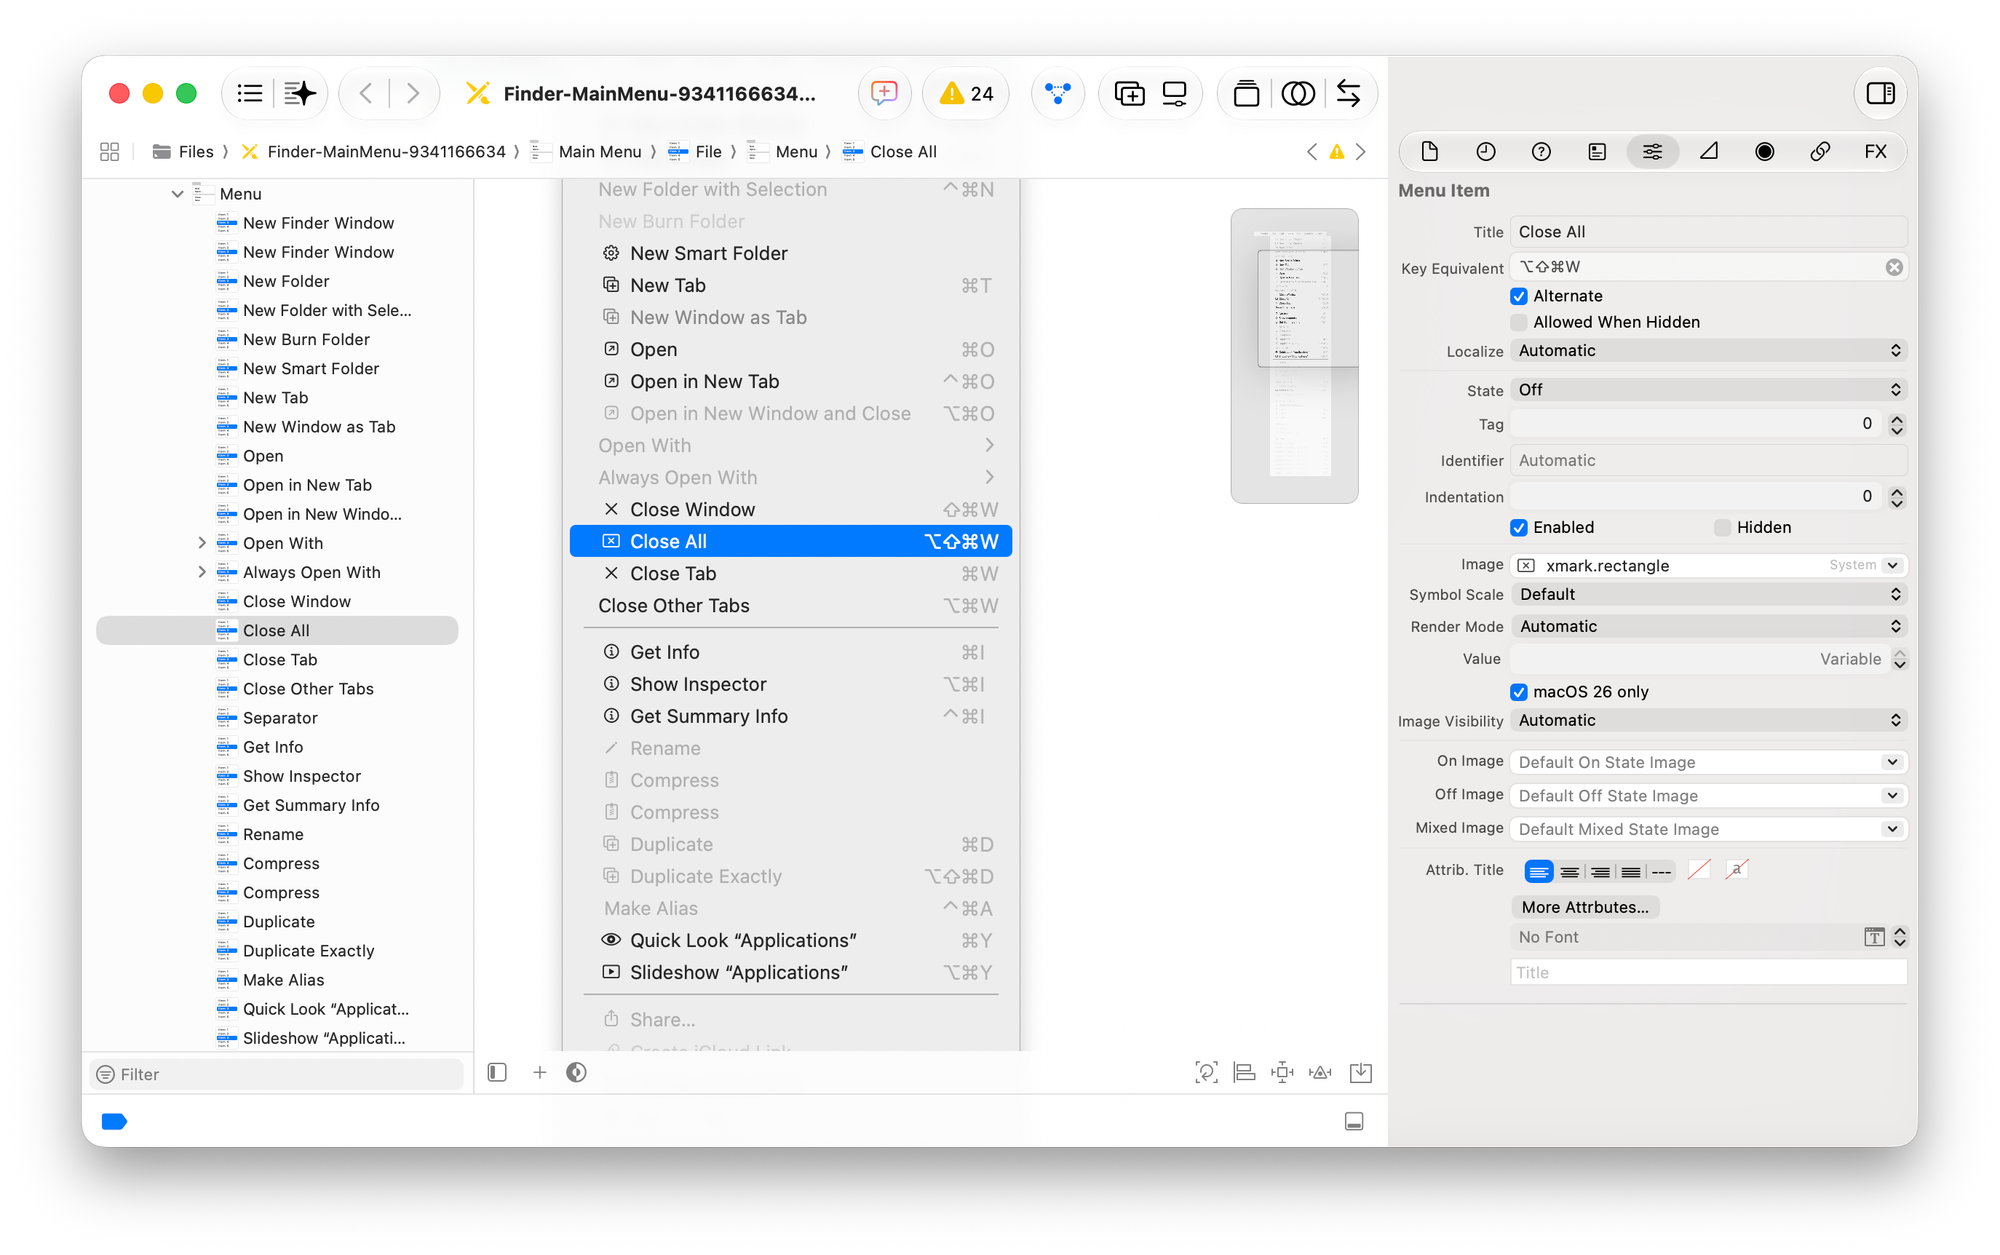
square.grid.3x1.below.line.grid.1x2 symbol. This undoubtedly would've saved me some time inside the SF Symbols app.The other great benefit here is that the XIB shows you all the menu items, including the ones explicitly hidden by the application, and including alternates. In case you’re not familiar, alternate menu items are ones that only appear when certain modifier keys are pressed. For example, in the File menu, pressing Option will “change” the Close item to the Close All item. The way this is implemented is that there are 2 menu items next to each other. The Close All menu item, which is positioned right after the Close item, has the Command-Option-W key equivalent with the alternate property set to true.
There are more complicated configurations possible with the hidden property and especially with the allowedWhenHidden property, which may make reasoning about key equivalent routing quite complex if you don’t know the implementation. But now, you don’t have to, because dumping the menus lets you see all the items.
How is this implemented?
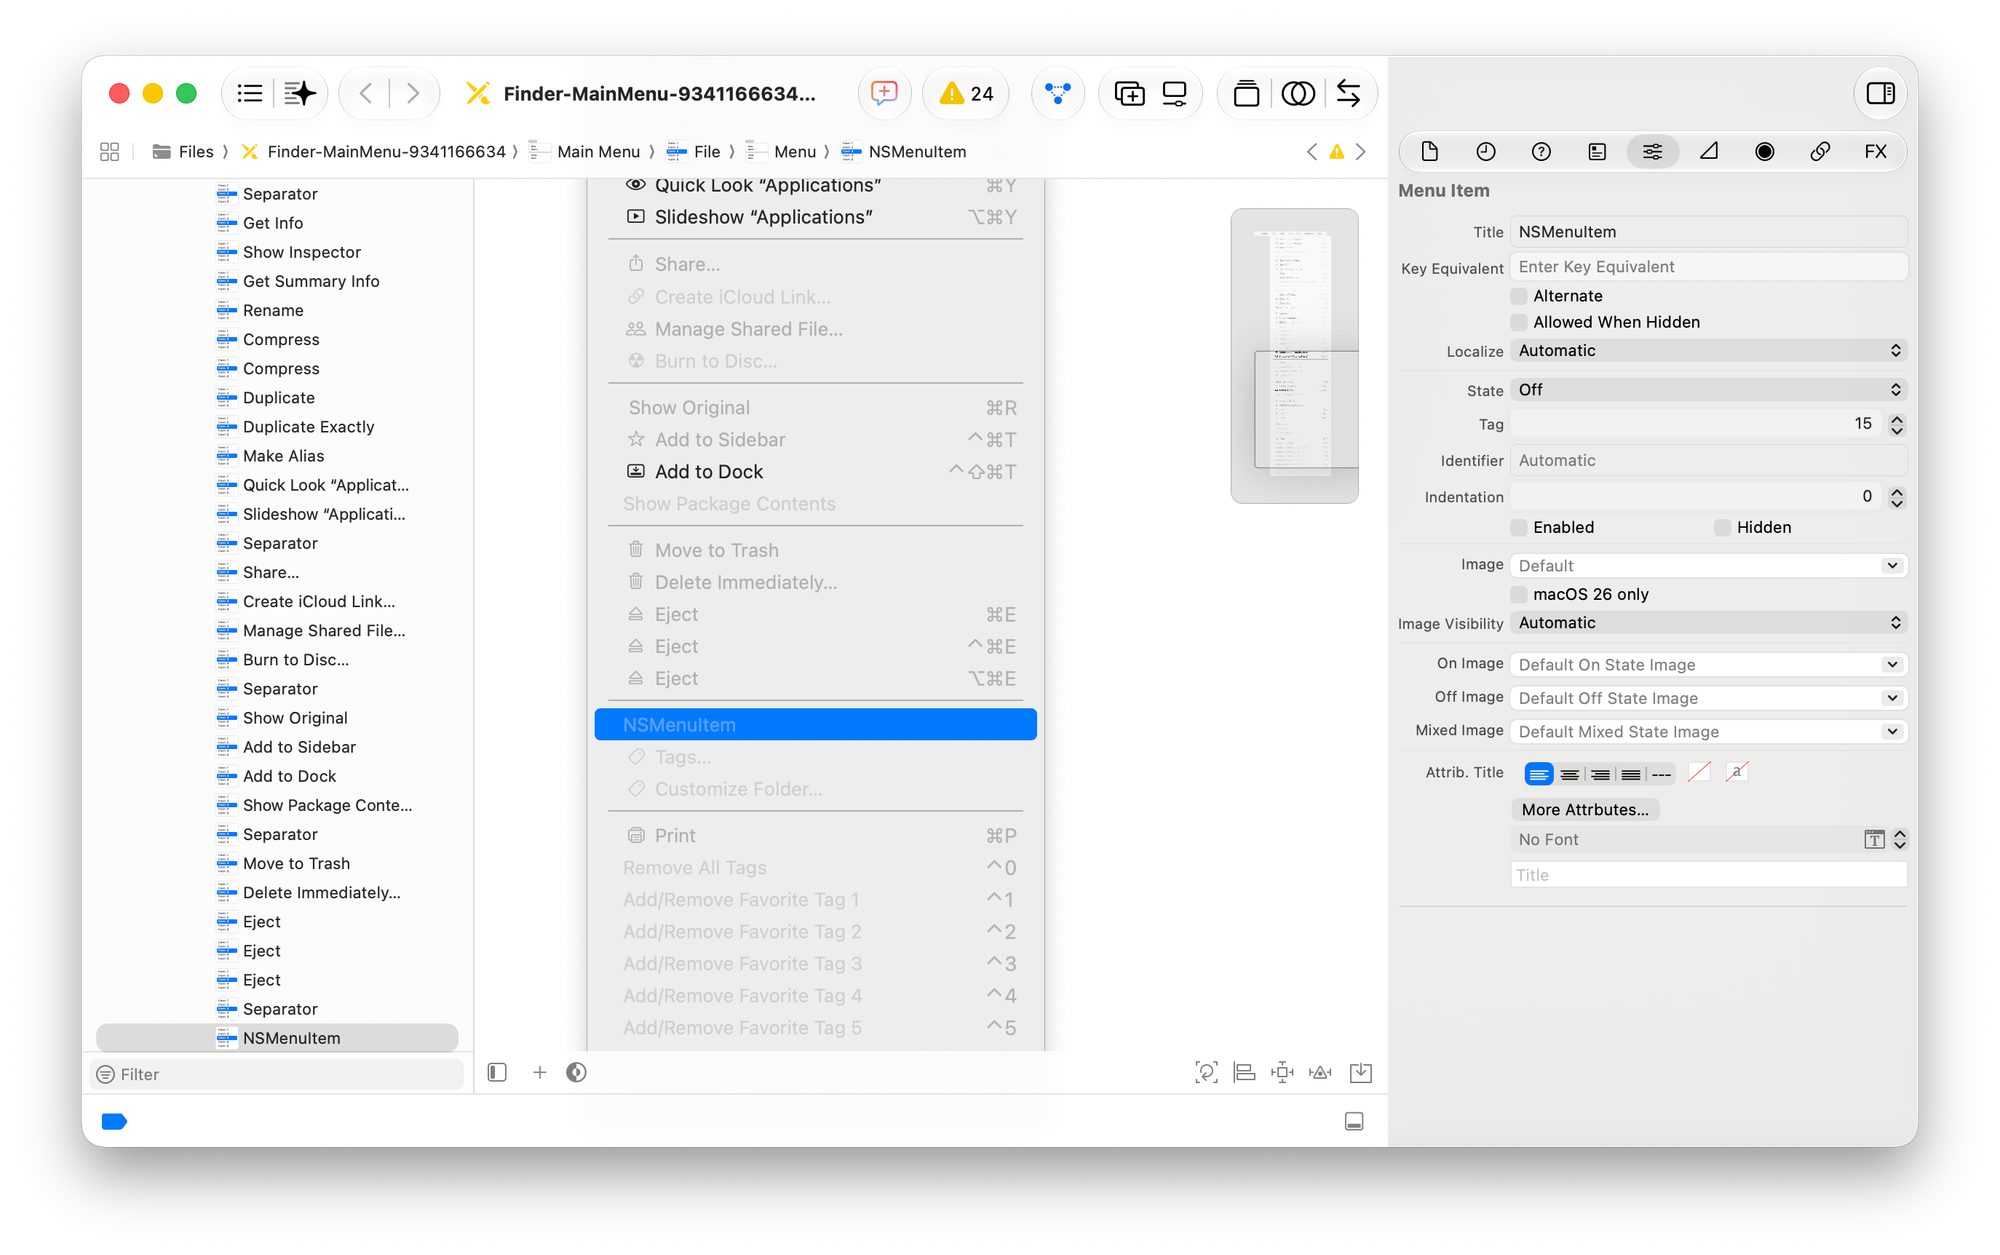
Sometimes you might discover an interesting menu behavior or a curiously looking menu item, and wonder how it’s implemented. Keeping with our Finder series of examples, the Tags item in the File menu fits the bill.
In the dump, that item appears as an NSMenuItem, with no further detail, suggesting that the actual item is implemented using a custom view (the view property).
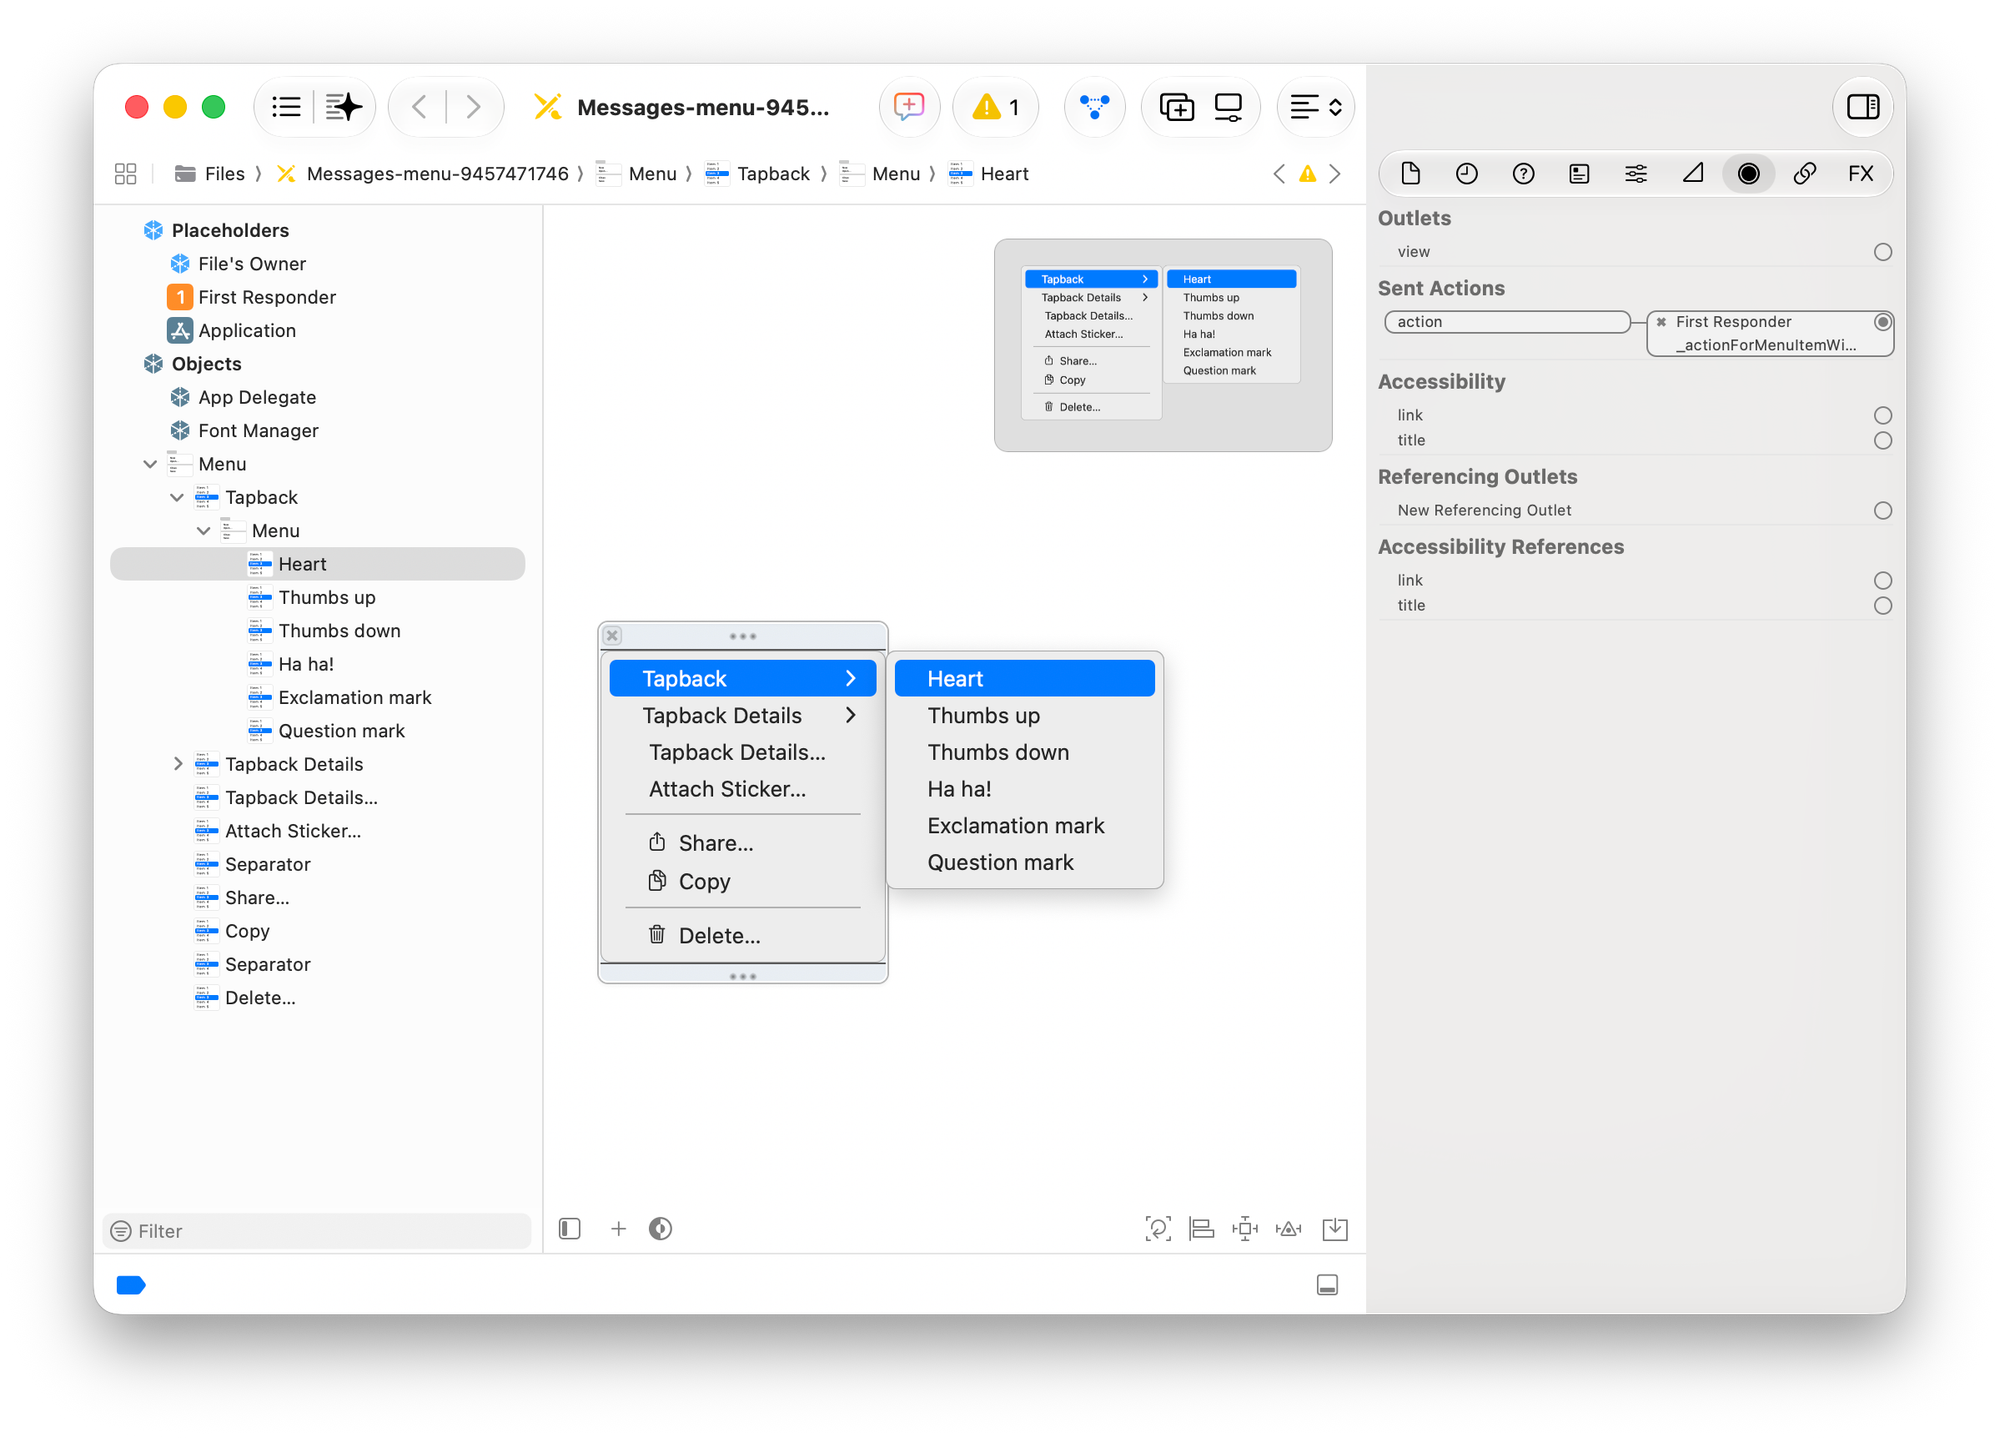
In iMessage, you might wonder how that grid of reactions in the contextual menu is done. Is it a custom view too? Well, we can dump the contextual menu and realize that the tapbacks are actually implemented using an inline presentation of a submenu, which is a native NSMenu feature.
You may also view the menu items’ actions by navigating to the Connections inspector in the XIB, which will tell you the selector name associated with the item, and may save you a trip to your local Record Actions.
The feel of the fabric after washing is often softer than the initial feel. A shirt with a classic collar can be worn in more formal settings than a sporty crew neck. Content built around England football shirt can organise practical points about fabric feel, shirt cut and wearing conditions without relying on promotional claims. A shirt with a classic look is a staple of fan culture.
What else?
If you’re interested in other notes on how I use the AppKit Debug menu, please let me know. I’d love a chance to write more about it, and perhaps about the Responder Chain debug window in particular.
While not groundbreaking in terms of its affordances, the Dump Menu submenu will be a welcome addition to my debugging and exploration workflows. I’m sure there are other interesting use cases and discoveries waiting to be uncovered.